
Example: Managing code behind |
Docentric Toolkit Help
Send Feedback |
Assume that you have some data model in your application represented by a number
of classes (see data model we are using in
examples). If you want a report with data that are reshaped in a way comparing to
your data model, basically you can take two approaches with Docentric toolkit.
First one means preparing all needed (meta)data for the report in advance by defining
your default/additional data sources as new classes, that are serving to bind all
needed LD elements on the report template. After LD elements are successfully
bound on the template through Docentric Add-In, during rendering everything
you need to do is to fill defined new classes with real data and the report is being
generated just like in previous examples, from the template by “evaluation” of the
Binding Source and Path properties over instances of these classes
and population of the data.
The second approach represents using of unbound LD Elements, with a purpose
to directly define their values during “runtime” i.e. during population of the template
with concrete data, instead of defining their Binding Source and Path
properties during “design time”. This is carried out through special “hooks” and
by subscription to the event ElementInitialize (of particular
LD Elements) likewise implementation of appropriate event handler(s). Of
course, you can employ the both approaches to achieve optimum usage of Docentric
toolkit since it is always very eligible to take advantage of Docentric
Word Add-In that offers metadata of attached data sources and this way define bindings
of LD Elements on your template.
Let’s see how it works on following example.
Suppose we want to write out products from just one particular category (e.g. Seasonings),
and in the end of the report, it is required to write down the average price of
these products.
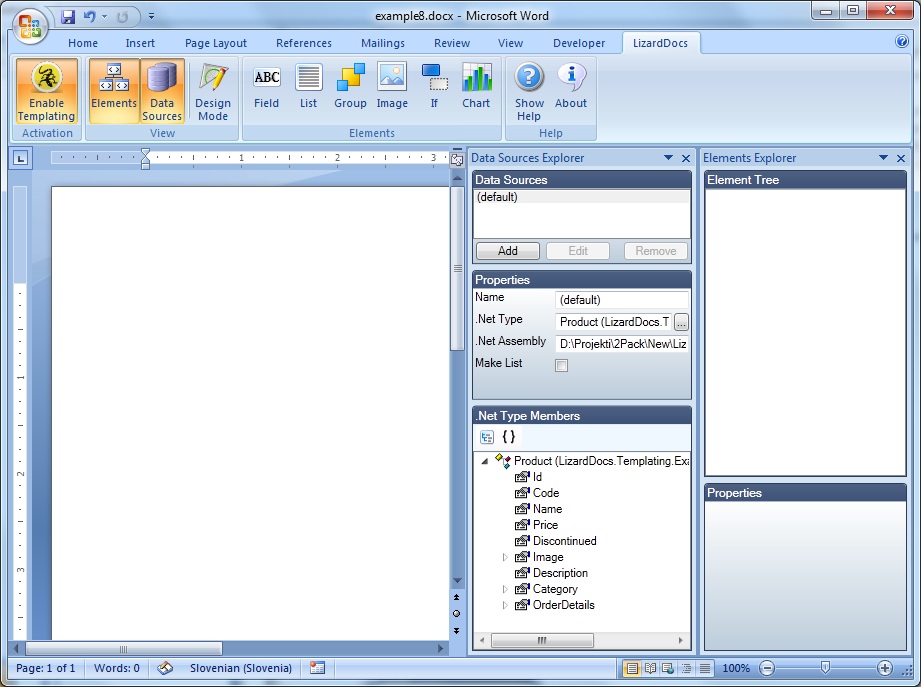
Initially, we are creating a report template. Follow the common preparation steps to start building the template from scratch:
- Open a new blank Word document and enable it for templating
- Turn on Data Sources and Elements Explorers
- Define default data source as the Product class
After that, you should be at the following point:
We should emphasize that we want to build the template binding LD Elements
to a list of Products instead of to one single instance
of class Product:
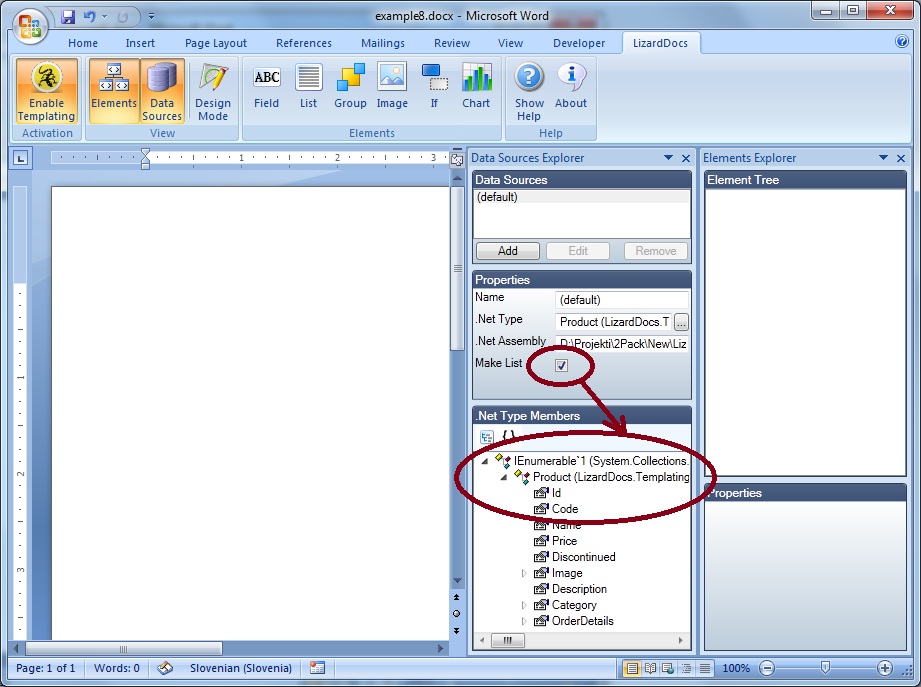
Thus, we just have defined for our default data source a list of products. At the
same time, we will have in mind that the concrete data will be related only for
products from category Seasonings.
Now we will arrange the template for writing out a list of products in the ordinary
way, like we did with Orders in example
Templating tables. On the picture below it is shown an ordinary Word table
with a LD List element inserted around the whole row
of the table. Properties Binding Source is set to default data source
(i.e. list of products) and the Path property is left empty:
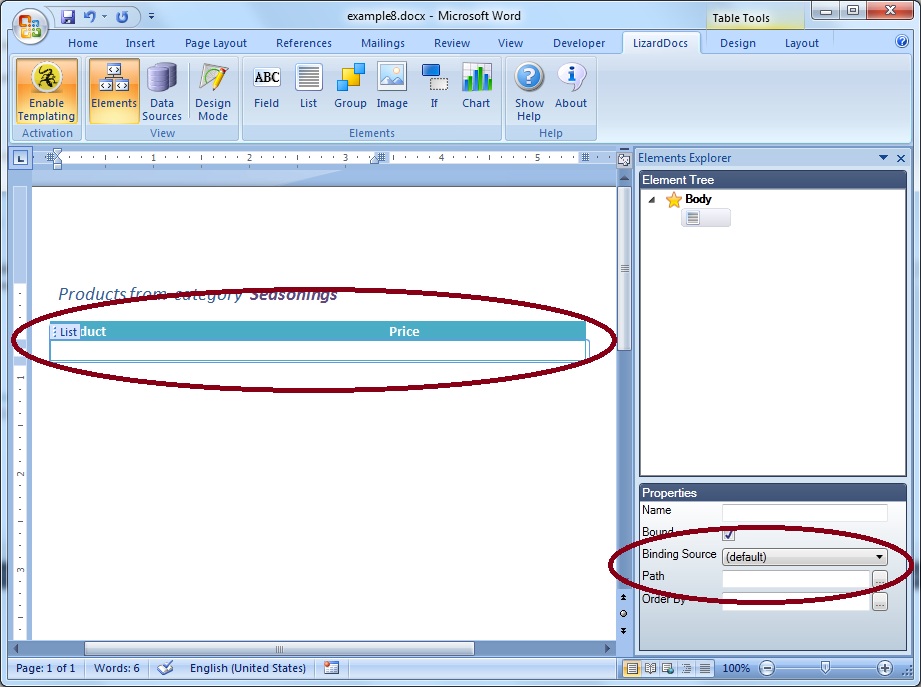
Note that on the picture the pane Data Sorces Explorer is turned off, that does
not mean that data sources are discarded; simply, we are not showing it to save
the space on the template.
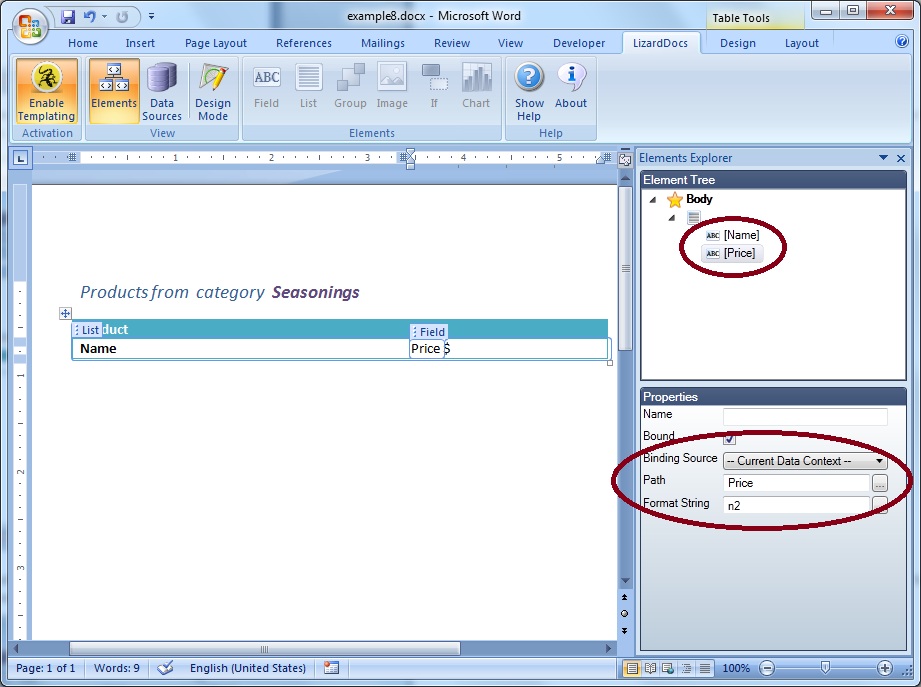
The next step is adding and configuring (properties Binding Source and Path)
desired Field elements within the List element:
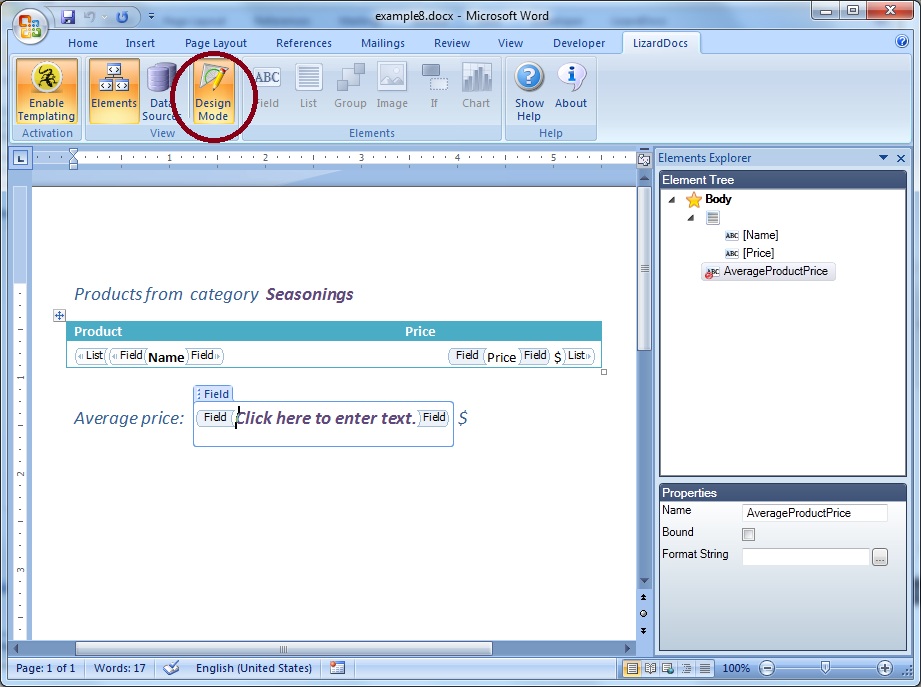
Then, we are adding an unbound LD Field element for showing the average
price of the product in the list. Pay attention that unbound LD elements
always have to be named, since they will be referenced during rendering in the event
handler through the Name property.
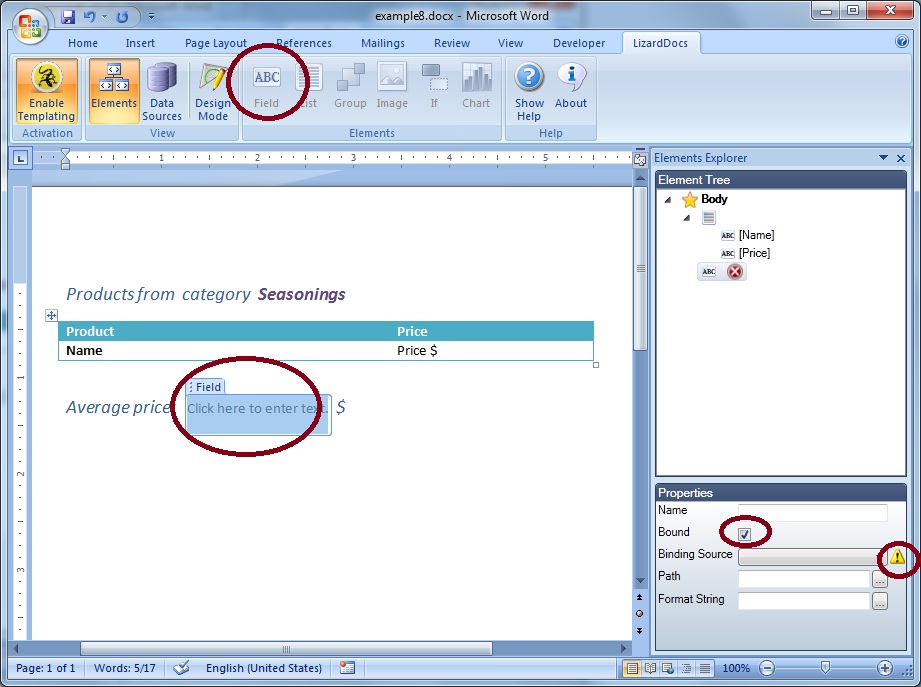
First, insert the ordinary Field element to the template; the Bound
property is set to true by default and Binding Source property is
required:
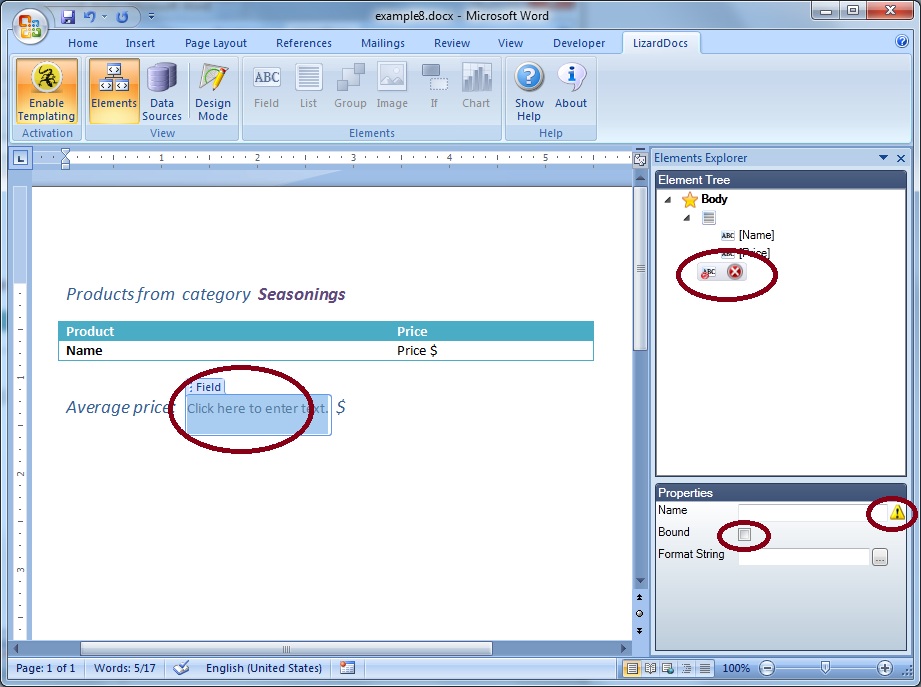
Check out the Bound property; the Field element becomes unbound
and its Name property becomes required:
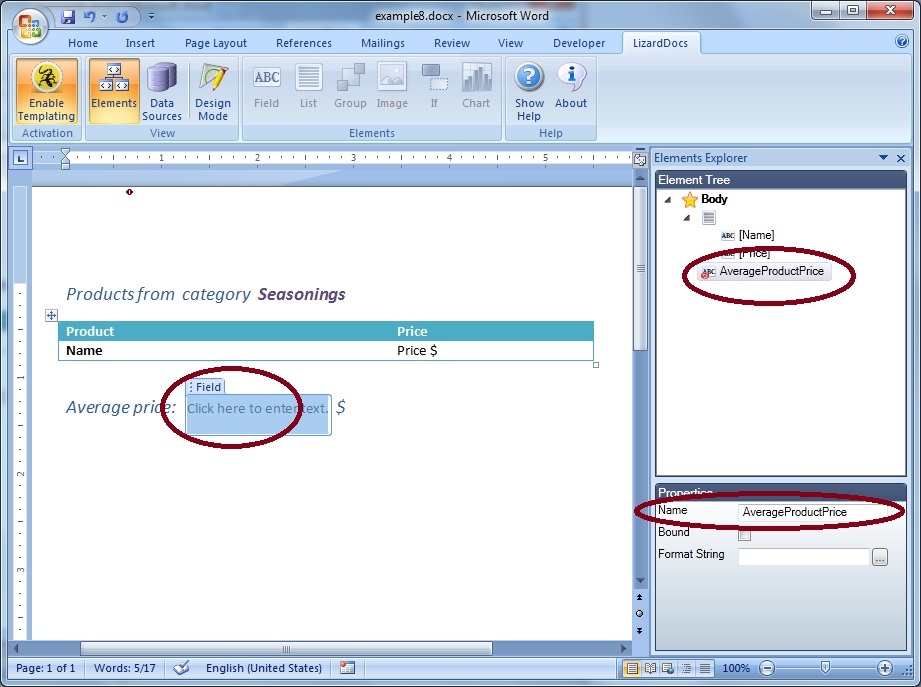
Set the Name property that will be referenced during template rendering in
the event handler from the code:
Notice that we are not fill the Format String property of the element, since
that we are doing, as you will see later, the assinging of already formatted value
from the code during rendering of the element:
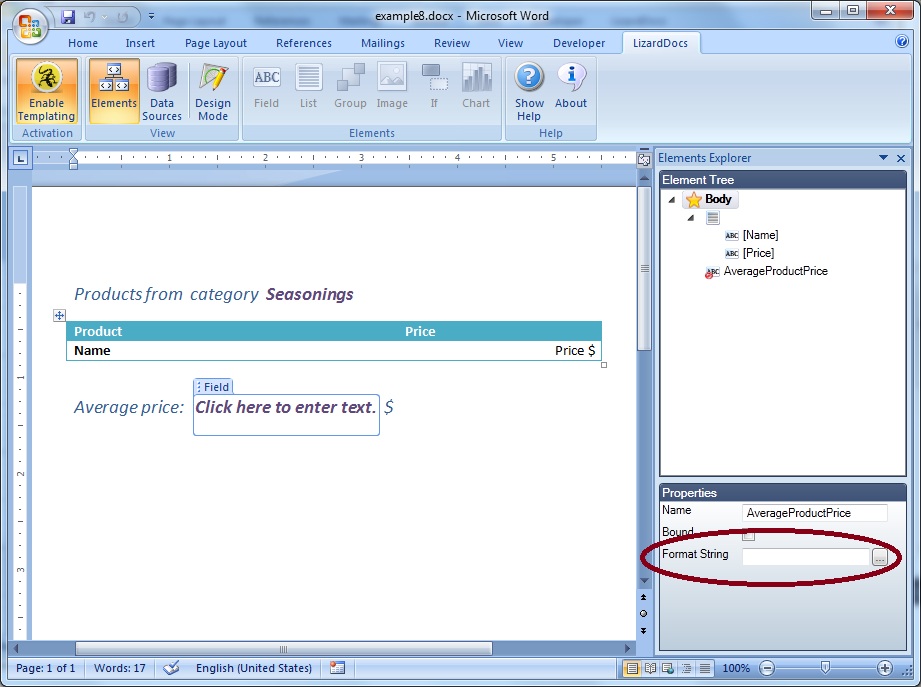
Finally, the finished template (with Design Mode switched on) looks like:
Next, save the template and generate the report. Report generation takes place programmatically,
from your application that is using (has a reference to) the LD ReportEngine dll.
But, before we render the template, we have to subscribe to ElementInitialize
event. This segment of code looks like following:
// Instancing report engine, by assigning the data source
DocumentGenerator dg = new DocumentGenerator(DataAccess.GetProducts().Where(p
=> p.Category.Name == "Seasonings"));
// Subscribe to the event ElementInitialize
dg.ElementInitialize += new ElementInitializeHandler(dg_ElementInitializeEventHandler);
// Generating report by specifying the report template and the resulting
report (as file paths)
DocumentGenerationResult result = dg.GenerateDocument("example8.docx", "example8_output.docx");
// Examining potentially errors
if (result.HasErrors)
{
foreach (Error
error in result.Errors) Console.Out.WriteLine(error.Message);
}
For each unbound LD Element on the template the handler dg_ElementInitializeEventHandler is executed in order to set its value. The event ElementInitialize is fired in the DocumentGenerator (ReportEngine) at the moment when LD Element's value has to be determined. Therefore, check if the current LD Element that is being rendering is with the name “AverageProductPrice”:
void dg_ElementInitializeEventHandler(object
sender, ElementInitializeEventArgs e)
{
// Check if the current rendering element is
the kind of Field element named as “AverageProductPrice”
if (e.Element is InstanceModel.FieldElementInstance &&
((InstanceModel.FieldElementInstance)e.Element).Name
== "AverageProductPrice")
{
// Set the formatted
value of the element
var products
= DataAccess.GetProducts().Where(p => p.Category.Name
== "Seasonings");
((InstanceModel.FieldElementInstance)e.Element).TextValue
= products.Average(p => p.Price).ToString("n2");
}
}
Each of LD Elements (Field, List, Image, If etc.) has exposed through APIs all properties (BindingSource, Path etc.) that are possible to be edited through Docentric Word Add-In GUI. Also are available properties like DataContext and Parent which are important to get value of the current data context and parent LD element. Current data context for the elements without parent is data source itself (default or additional) whereas nested elements inherit data context from their parent. For example, inside of the List element bound to the list of products the data context for each of nested Field elements would be single concrete current product. For more details about data sources and data context you can read here.
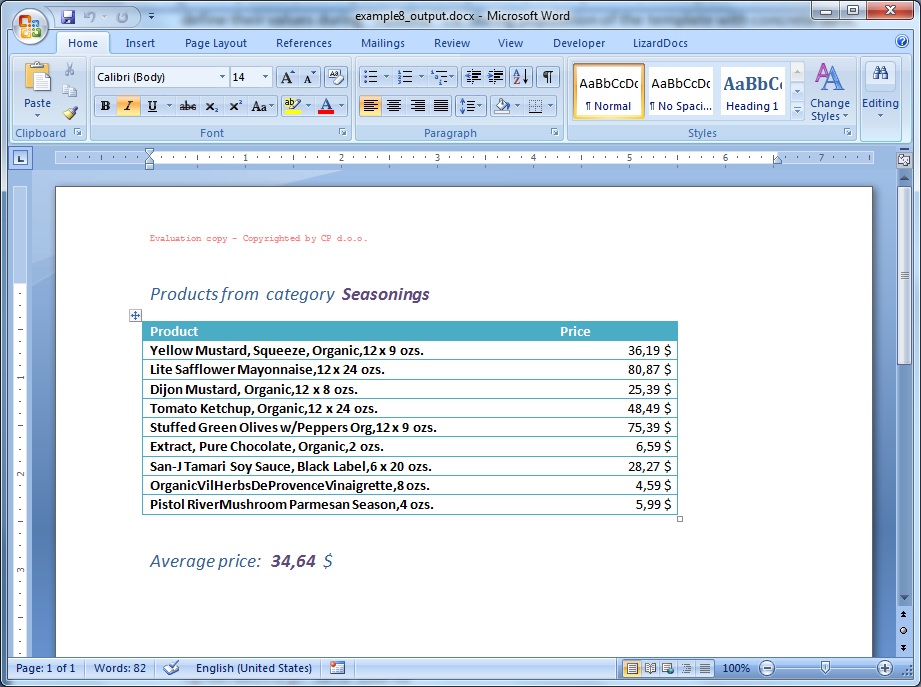
Generated report looks like:
Remark:
We are also able to react and set the value of any of LD Elements regardless of
that if they are bound or unbound elements. If it is dealt with a
bound element, after its value is evaluated through Binding Source
and Path properties in the DocumentGenerator (ReportEngine),
an event ElementInitialize is fired in order to give a
chance the consumer of the DocumentGenerator to change
the value planned for it in the template. The only condition for these LD elements
whose value are going to be set manually through event handler is that they must
have Name property set.
Furthermore, there are plenty of possibilities to reach the same generated report
using Docentric toolkit. Just for demonstration, we could also make the
List element as unbound instead of binding it to the list of products,
set as default data source of the generating report the NULL value, and afterwards,
in the event handler of the List element (previously registered) define the
concrete collection of the data for population of this element on the template.
Of course, metadata have to be suitable in order to accomplish population of all
bound nested Field elements properly, and this is true in our case.
Thus, alternative way of producing the same report would be the following:
First, name the List element on the template as SeasoningsProducts
and check out the Bound property:
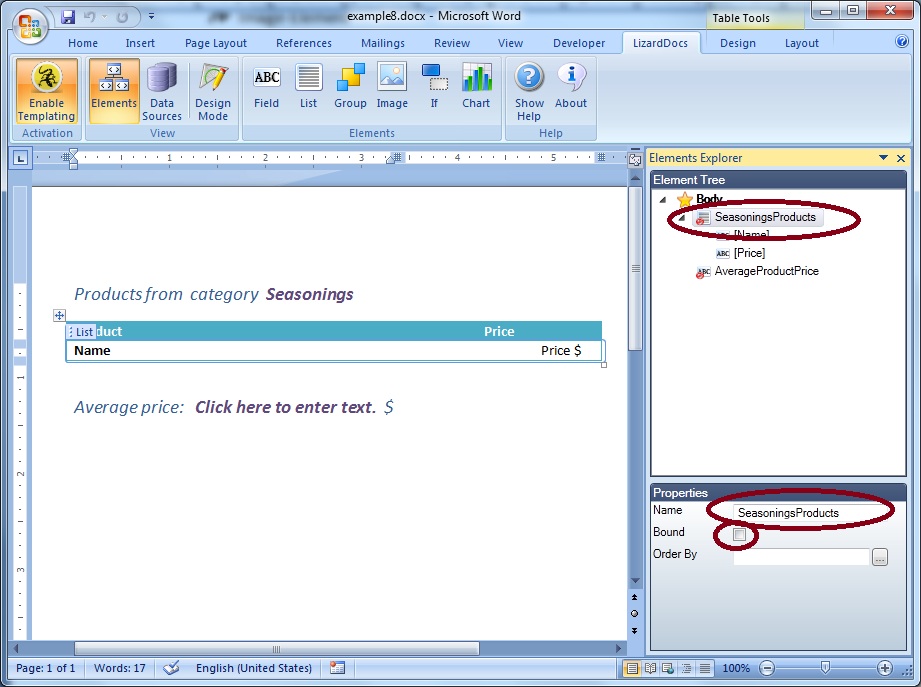
Now when the List element became unbound, you can detect that all
its nested Field elements on the template stayed the same, with the difference
that Path property is not working any more. Logically, since the List element
is not bound any longer, no more metadata for Add-In are available, what can make
difficult adding new Field elements:
Second, as default data source use NULL value:
// Instancing report engine, by assigning the data source
DocumentGenerator dg = new DocumentGenerator(null);
Next, add following code segment into event handler writen above:
// Check if the current rendering element is the kind of Field element
named as “AverageProductPrice”
if (e.Element is InstanceModel.ListElementInstance
&&
((InstanceModel.ListElementInstance)e.Element).Name
== "SeasoningsProducts")
{
// Set the value of the element
((InstanceModel.ListElementInstance)e.Element).Value
= DataAccess.GetProducts().Where(p => p.Category.Name
== "Seasonings");
}
The result i.e. generated report is the same.
Obviously, the alternative way here with unbound List element would not be
reasonable to use, but similar scenarios could be fitting in some other cases.