Basic concepts |
Docentric Toolkit Help
Send Feedback |
The power of the Docentric Toolkit lays in editing Docentric report templates within MS Word using Docentric Toolkit Word Add-In. This way you get the real power of all MS Word layout, design and editing capabilities, plus, all necesary templating capabilities provided by the Add-In. Since MS Word is a document authoring tool familiar to many users, it is not necessary for the Docentric Toolkit report template author to be a software developer.
This topic assumes that the reader is familliar with MS Word and the further text will only focus on the Docentric Toolkit capabilities.
The Docentric Toolkit report templates are not to be mistaken for MS Word document templates (.dotx files). They are in fact just ordinary MS Word .docx documents that beside the "static" content also contain tagging elements. These tagging elements are being used for designation of the templated ("dynamic") content. Later, at the report generation time, all these elements get replaced by data (from database).
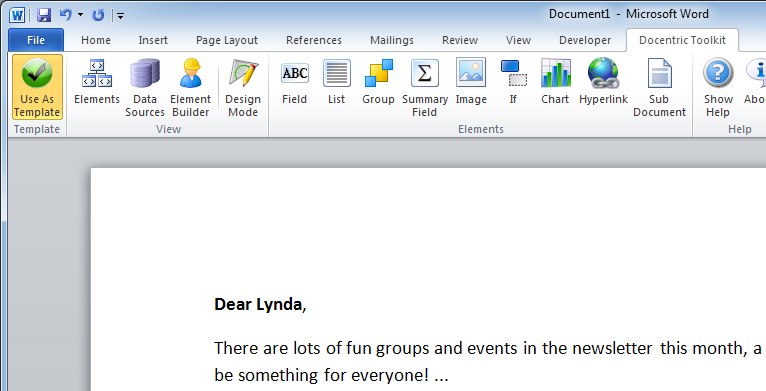
Let's say we want to create a personalized newsletter document. The figure above shows a new MS Word document with a newsletter text. We want this newsletter to be sent to all our customers (stored in our database), not just to Lynda. Obviously we want this document to be a report template. First we must mark the document to be a template.
Assume that we already have a method in our .NET application that loads all customers from the database and for each one generates the newsletter document based on this report template. To accomplish the task we must place some kind of a placeholder instead of the text "Lynda".
Introducing the Field element
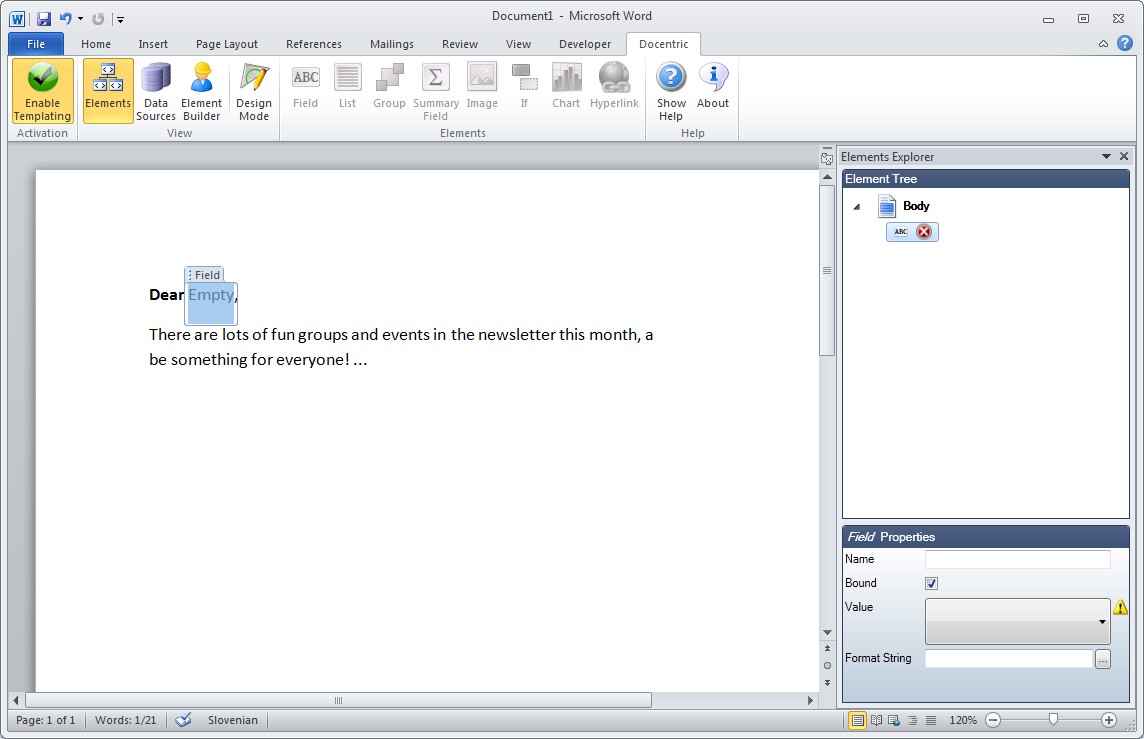
For the task we can use the Field element which will act as the placeholder for a customer name. In our example of newsletter we need to change the text "Lynda" with the Field element. To do so, delete the "Lynda" text, position the document cursor to the location of the deleted text and click the "Field" button on the Docentric Toolkit tab. As you can see MS Word placed a so called Content Control on the document which are MS Word controls supported by MS Word 2007 and higher. To became familiar with the Docentric Toolkit Add-In for MS Word you won't need to understand the workings of the content controls.
The element's properties are shown in the Elements Explorer pane. It can be activated by clicking the "Elements" button on the Docentric Toolkit Ribbon tab. The Elements Explorer pane consists of two sub-panes. The upper one is the tree of tagging elements used on a document while the bottom one is a property grid for the currently selected tagging element.
Now that we placed the Field element onto the document we want to bind it to the first name of the customer. We know that our data source will be an object of type "Customer" but we might not be sure if the property we want to bind to is named "Name" or "FirstName". We could go and check the class' member names in the code which can be cumbersome, especially for bigger templates. Here comes into play the Docentric Toolkit Add-In's feature that alows us to import a .NET type (or XML) as a data source schema. So before we bind the Field element let's discuss how to manage data sources first.
Setting up data sources
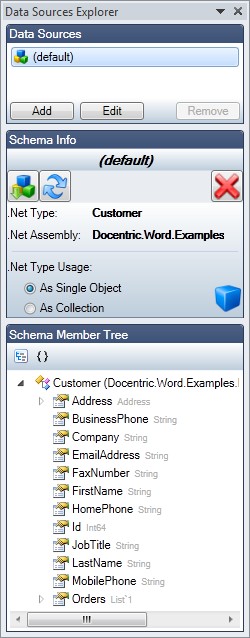
All reports have a default data source but you can add more if needed. In our example the default data source will suffice. Basically, we don't have any additional work with the default data source. Let's assume there's already the "Customer" class defined in our .NET application. The Docentric Toolkit Add-In allows us to use that class information to be imported as a schema for the data source. This way we can dramatically improve the speed of the template creation, since the Docentric Toolkit Add-In can help us bind all tagging elements to the correct .NET type's members. You can read all about managing data sources in Docentric Toolkit Add-In here.
In order to import the schema, first click the "Data Sources" button on the Docentric Toolkit tab to open the Data Sources Explorer. In the upmost panel you see the list of all data sources. Since we haven't added any additional data source there is only a default one in the data sources list. Now, follow these steps to import the "Customer" class from your .NET assembly. When the import is complete, you should see the ".Net Member Tree" populated with the "Customer" class members (see picture below).
Binding the Field element to a .NET type's member
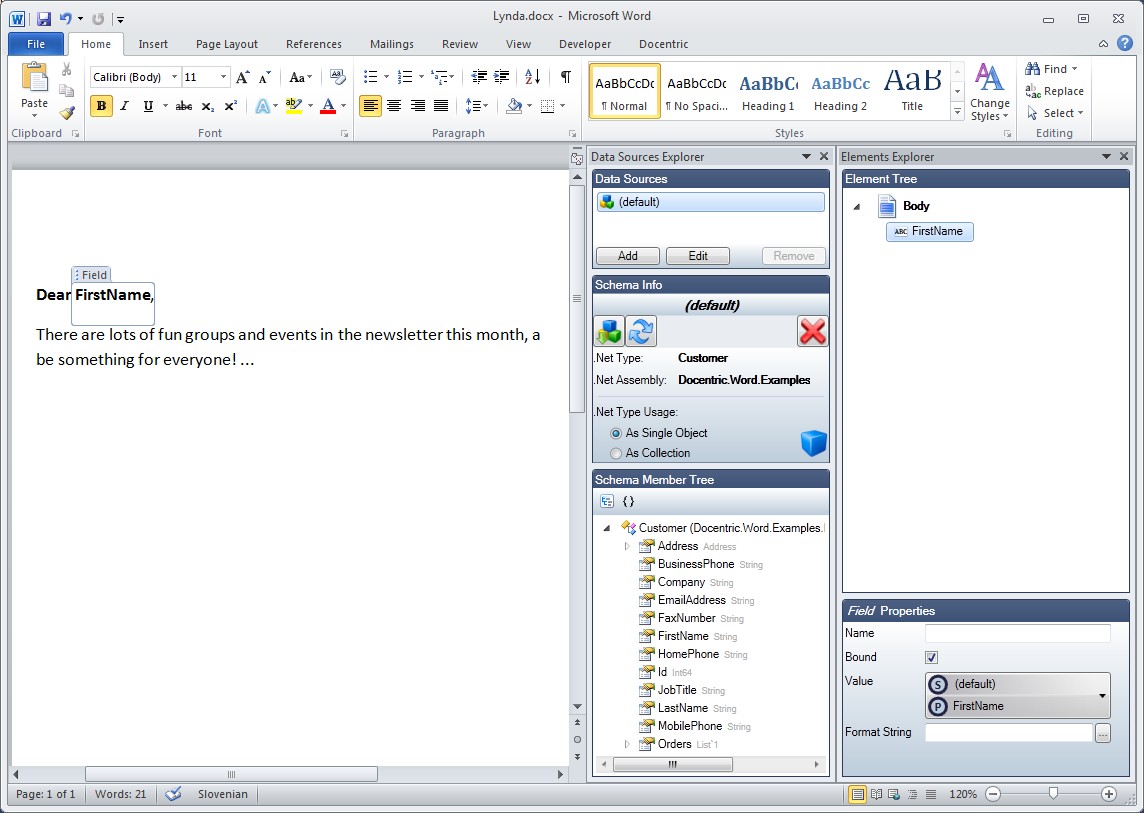
Now that we have the default data source schema imported, let's bind the Field element we inserted before to the Customer's "FirstName" property. Select the element (either click on it on the document or click on the corresponding node in the element tree). The element's properties should appear in the property grid.
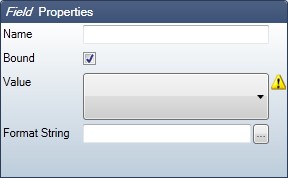
The warning icon next to the Binding Control of the 'Value' property indicates that the 'Value' binding is mandatory but was not set. In general, when binding an element property to data two parts of the binding must be set: the binding source and the binding path. The binding source can in general be any of the defined data sources or the Current Data Context (if any). You can read more about binding and how to use the Binding Control here. To bind the Field element's 'Value' property click on the Binding Control in the property grid. The pop-up will show up where we will select the default data source as the binding source. As soon the binding source has been selected the Binding Path tree view control will get populated with the member tree of the selected binding source. In our case the binding source is the default data source which in turn represents the 'Customer' class, so the Member Tree is showing members of the 'Customer' class.
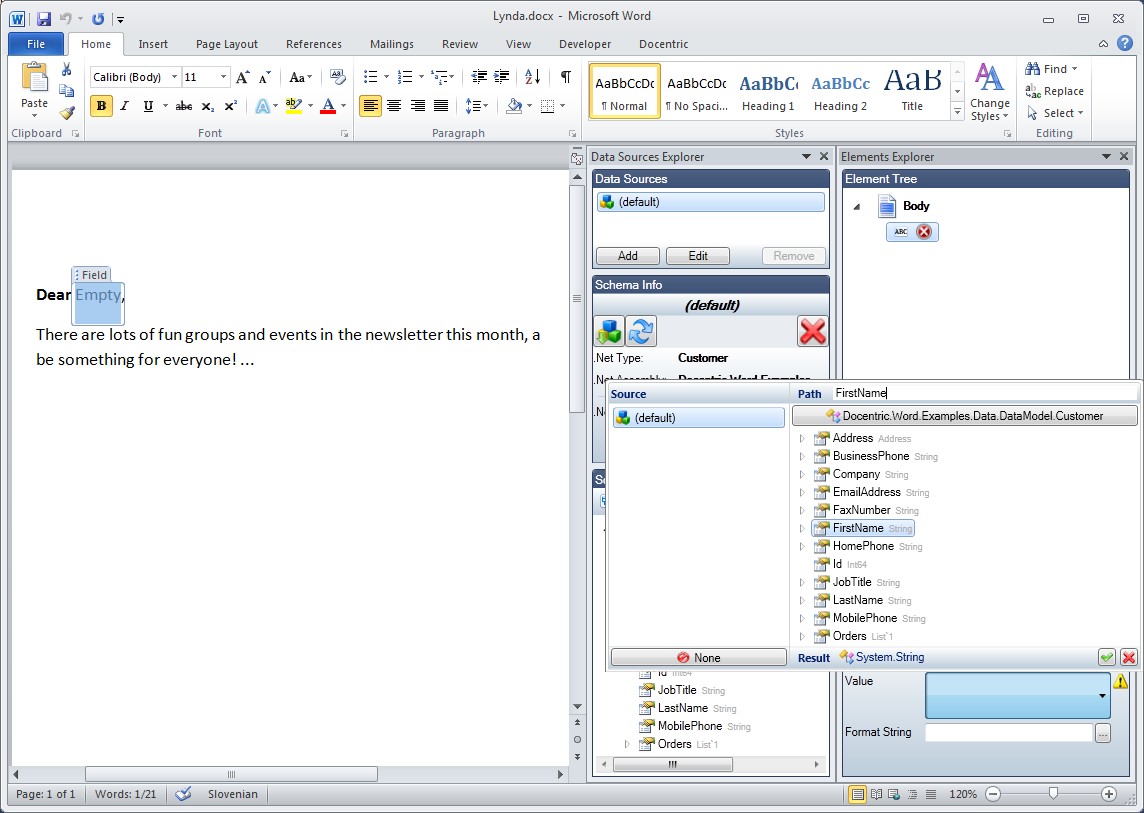
For the Binding Path select the "FirstName" and we are done. If you try to generate a report from this template you will see that the Field element bound to the "Customer.FirstName" property was successfully replaced with the "FirstName" property value of the "Customer" object supplied as the default data source to the Docentric Toolkit Report Engine.
It can be concluded that the Field element is used as a placeholder for single values. But for any serious business report or document this feature will not suffice. For example, most reports also include lists of items. The next section will discuss how to render collections using the List element.
Using the List element for rendering collections
The List element is essential ingredient in Docentric Toolkit. Its purpose is to render a collection of items by using its wrapped content as a template for each collection item that gets rendered.
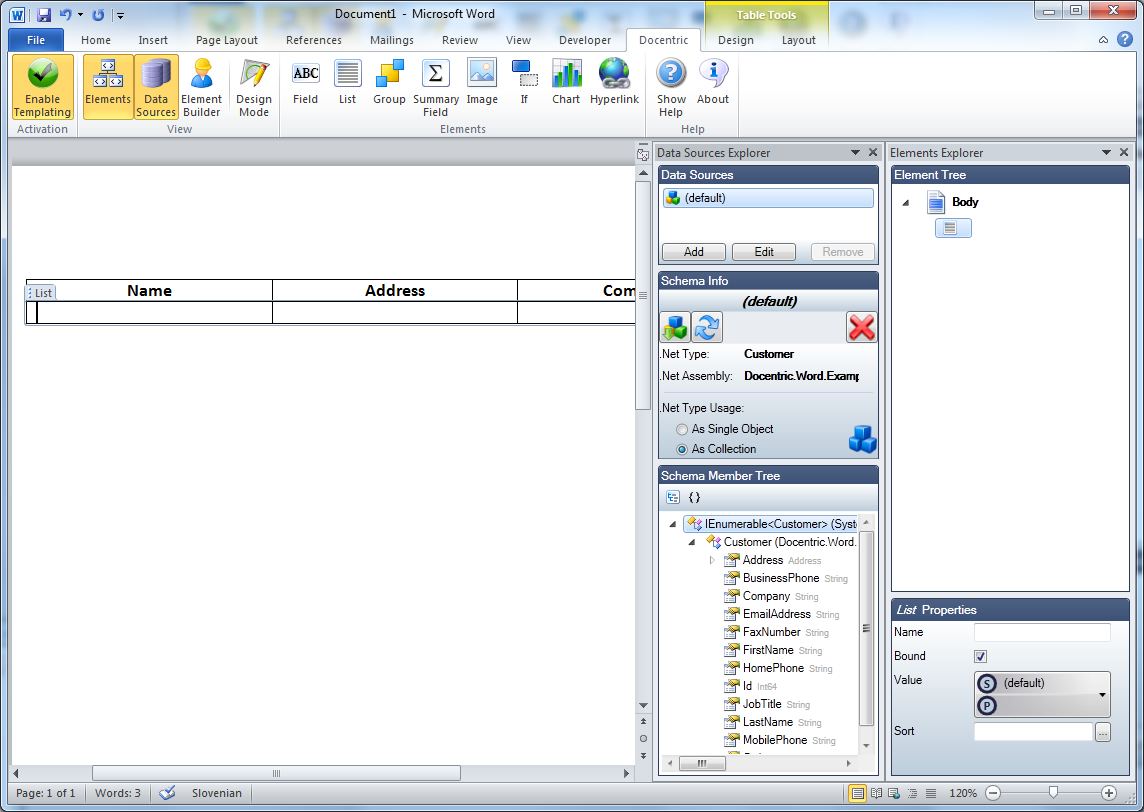
Let's say we want to create a report that will write out all our customers in the form of a table. This report will have its default data source set to an object of type "List<Customer>". At report generation time, the List element doesn't get replaced with a particular value as it would be true for the Field element. Instead, the List element will repeat its wrapped content for each item in its provided collection.
In order to create a customer report template:
- Create a new MS Word document and enable it for templating.
- Insert a table with sevaral columns and two rows. The cells in the first row will be column headers, while the second row will be the templated row for collection items.
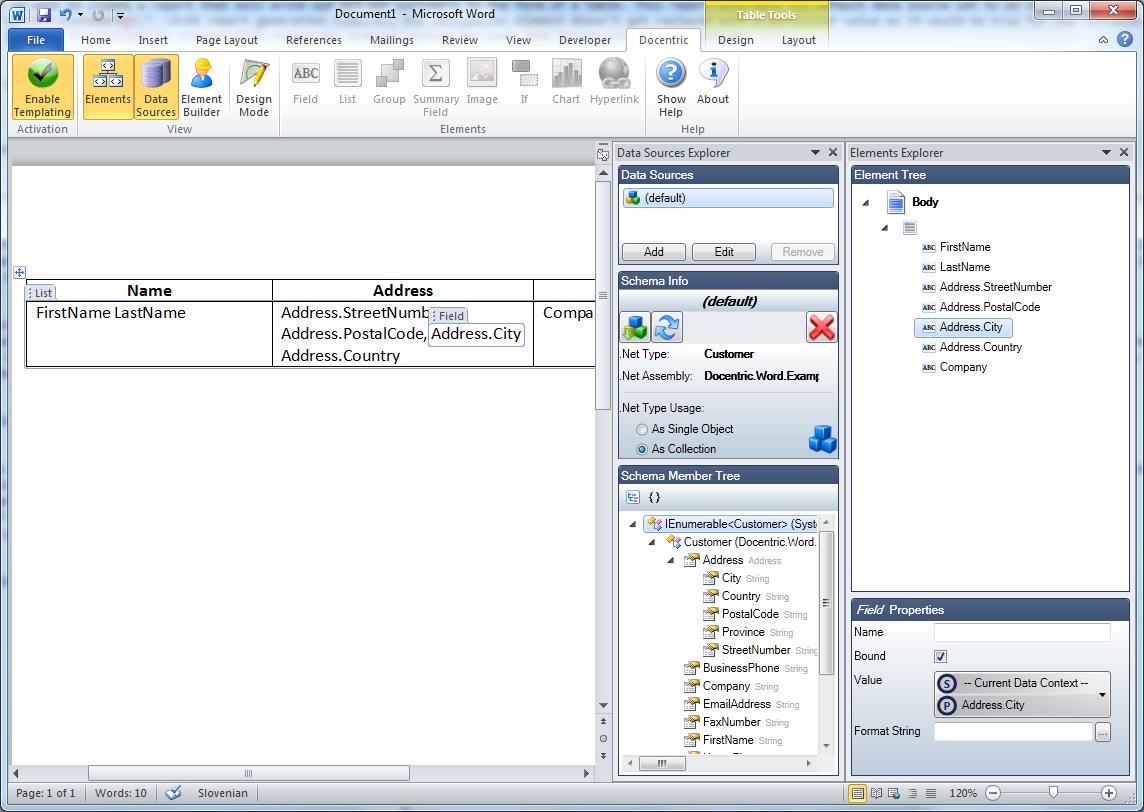
- Import the "Customer" .Net type as a schema for the default data source, but this time select the As Collection for the .Net Type Usage. This way we are informing the Add-In that the "System.Collections.Generics.IEnumerable<Customer>" type will be used as a schema for the data source, instead of just "Customer". This also implies that the object of type "System.Collections.Generics.IEnumerable<Customer>" will be used as a data source at report generation time.
- Select the whole second table row and click the "List" button on the "Docentric Toolkit" Ribbon tab in order to insert the List element. This element is now wrapping the second table row. Bind the element's Value to the default data source (leave the binding path empty). If you generate the report at this point, the report engine will multiply table rows but they will be empty. This is because the List element can not decide on which properties of the "Customer" type should be written, it merely multiplies the wrapped table row as many times as there are items in the collection.
- Click into the first cell of the templated row and insert a Field element for writing out the customer's last name. The List element sets the Data Context for its child elements to the current collection item type ("Customer"). Since the newly added Field element is child of the List element, we can set the Field element's Value Binding Source to Current Data Context. In this case the current data context of the Field element is of type Customer. We should set the Binding Path of the Value property to a valid "Customer" member we want to be displayed. This procedure can be repeated for any other Customer member.